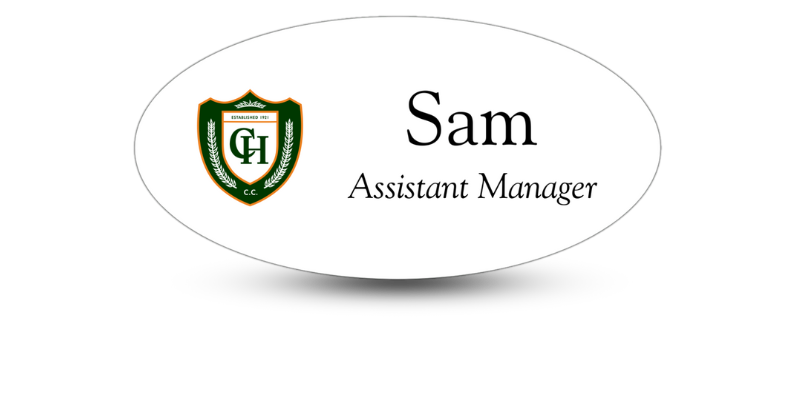
A Fall Conference Name Badge Checklist for Event Planners
Everything to Review Before Sending Your Attendee Badges to Print

Fall is one of the busiest seasons for conferences, trade shows, association meetings, corporate events, and professional networking. Event planners have venues to coordinate, speakers to manage, sponsors to support, and hundreds—or even thousands—of attendee details to track. In the middle of all that activity, name badges can look like a minor item on the planning list.
They are anything but minor.
A conference badge helps attendees meet one another, identify staff and speakers, supports access control, displays event branding, and may even connect guests to digital schedules and resources. When badges are hard to read, contain incorrect information, or fail at check-in, attendees notice immediately.
Use this fall conference name badge checklist to catch common problems before your full order goes to print.
Fall Conference Name Badge Checklist
1. Decide What the Badge Needs to Do
Start with the badge’s purpose. Is it mainly for introductions, or will it also control access, identify attendee groups, recognize sponsors, or share digital content?
A conference name badge may need to:
- Display the attendee’s name, title, and company
- Identify speakers, exhibitors, sponsors, staff, or VIPs
- Show access levels for sessions or special areas
- Support networking and lead collection
- Link to a schedule, map, event app, or digital profile
- Carry the event’s branding and sponsor recognition
Knowing which jobs the badge must perform will help you choose its size, layout, material, and attachment. Trying to add every possible feature without setting priorities often leads to a crowded design.
2. Choose a Practical Badge Size
The right size gives important information room to breathe while remaining comfortable to wear. A badge that is too small forces planners to shrink names and titles. One that is unnecessarily large may swing, bend, or get in the attendee’s way.
Consider how much information you plan to include, how far away the name should be readable, and whether the badge needs space for a QR code or color-coded role label. If the event lasts several days, comfort and durability become even more important.
Don’t choose a size based only on a design displayed on a computer. Print a sample at actual size, place it in the selected holder, and have someone wear it.
3. Include Only Useful Information
Most conference name badges need a preferred name, surname, company, and job title. Depending on the event, you might also add:
- Attendee category
- Professional credentials
- City, state, or country
- Pronouns, when voluntarily provided
- Networking interests
- Session or access level
- A QR code
Every extra line competes for attention. Ask what information will help attendees connect or help staff operate the event. If a field does neither, it may not belong on the badge.
4. Make the Attendee’s Name the Main Element
At a networking event, the name is the most important part of the badge. It should be easy to spot at a comfortable conversational distance.
Use a large, clear font with enough contrast against the background. Avoid giving the event logo, decorative graphics, or sponsor artwork more visual weight than the attendee’s name. If you want to create a friendly atmosphere, make the preferred first name especially prominent.
Plan for long names before the final data is imported. Set a reasonable minimum type size and create an alternate layout for names that exceed the standard space. Shrinking a long name until it is barely readable defeats the badge’s main purpose.
5. Select a Readable Font and Color Combination
Simple sans-serif fonts usually perform best on conference badges. Look for clear letterforms, medium or bold weights, and comfortable spacing. Decorative scripts, thin lettering, and highly condensed fonts may look attractive on screen but become difficult to read in a busy exhibit hall.
Color contrast matters just as much as font selection. Dark text on a light background or light text on a dark background is usually dependable. Test the design in spaces similar to the venue, including bright exhibit areas, dim presentation rooms, outdoor gathering spaces, and evening receptions.
Avoid placing names over photographs, gradients, or detailed patterns. Good branding should support the attendee information rather than compete with it.
6. Create Clear Attendee Categories
Conference staff need to identify different groups quickly. Attendees also appreciate knowing whether they are speaking with an exhibitor, presenter, volunteer, sponsor, or fellow guest.
Common categories include:
- Attendee
- Speaker
- Sponsor
- Exhibitor
- Staff
- Volunteer
- Media
- VIP
- Vendor
- Student
Color bands, borders, icons, and large printed labels can distinguish these categories. Do not rely on color alone, however. Pair each color with a word or symbol so the system remains clear to people with color-vision differences and when badges are viewed in poor lighting.
7. Consider Double-Sided Printing
Anyone who has attended a conference has seen lanyard badges turn backward. If the person’s name appears on only one side, the badge becomes useless until someone flips it around.
Printing key identification on both sides keeps the badge functional as the wearer moves. The back can repeat the full front design or combine the attendee’s name with useful event information, such as a short schedule, venue map, emergency contact number, or QR code.
If the reverse side carries different content, keep at least the attendee’s name and category visible there.
8. Give Every QR Code a Specific Job
QR codes can extend a printed badge without filling it with extra text. They may link to:
- A digital business card
- An attendee profile
- The event agenda
- A venue map
- Session details
- Speaker materials
- A lead-capture form
- A feedback survey
Test every code with several phones before printing. The linked page should load quickly, work well on mobile devices, and remain active for the full event. Leave enough open space around the code, and keep it away from punched holes, curved edges, or plastic seams that could interfere with scanning.
Think about privacy as well. A public-facing QR code should not reveal personal contact details or private attendee information unless the person has knowingly agreed to share it.
9. Review Branding and Sponsor Placement
Conference badges should look like part of the larger event. Use the same logo, colors, and visual style that appear on the website, signs, program, and registration materials.
Sponsor logos may also need a place on the badge or lanyard. Confirm placement requirements early and request high-resolution artwork before the production deadline. Give sponsors suitable recognition without allowing their logos to overpower attendee names.
Check every logo carefully. An outdated sponsor mark or low-resolution image can make an otherwise polished badge look unprofessional.
10. Match the Material to the Event
The event’s length and setting should guide the material choice.
Paper inserts in protective holders can be an affordable option for shorter conferences, and they are easy to replace onsite. Full-color plastic name badges offer greater durability and water resistance, making them useful for multi-day meetings or events with outdoor activities. Reusable designs may work well for recurring staff meetings or organizations that host frequent programs.
If sustainability is part of the event plan, explore recycled or recyclable materials and communicate disposal or return instructions clearly. A material is only a practical environmental choice if it also holds up for the duration of the event.
11. Choose a Comfortable Attachment
Lanyards are popular for conferences because they are visible and easy to distribute, but they are not the only option. Clips, magnetic fasteners, pins, and retractable reels may suit some groups or event formats better.
When using lanyards, check their width, length, attachment style, and breakaway features. Make sure the badge hangs high enough to read without forcing someone to look toward the wearer’s waist. If a sponsor logo appears on the lanyard, confirm that it remains visible when worn.
Comfort matters at a multi-day event. A badge that scratches, pulls on clothing, or constantly turns around will frustrate attendees.
12. Collect Badge Information Carefully
Many badge errors begin during registration. Clearly label every field that will be printed, and ask attendees for their preferred badge name rather than assuming their registration or payment name is correct.
Set standards for capitalization, abbreviations, professional credentials, job titles, and company names. Give attendees a chance to review their entries and establish a correction deadline before the print order is finalized.
Watch for special characters and punctuation that may not transfer correctly between registration software and the badge template.
13. Proof Every Detail Before Printing
A strong proofing process should catch:
- Misspelled or duplicate names
- Incorrect job titles
- Outdated company names
- Missing fields
- Inconsistent capitalization
- Broken special characters
- Incorrect attendee categories
- Duplicate or nonworking QR codes
- Blurry logos
- Text that extends beyond the safe print area
Have at least two people review the final attendee list and badge proof. One person may notice data errors while another spots layout or branding problems.
14. Order Extras and Prepare for Changes
Even a carefully managed conference will have late registrations, lost badges, corrected titles, unexpected staff additions, and damaged credentials. Order extra holders, lanyards, fasteners, and blank badges.
Create an onsite process for replacements and corrections. Registration staff should know how to verify an attendee’s identity, change a category, and produce a clean replacement without slowing the check-in line.
Keep printers, labels, markers, blank stock, and spare attachments together at a clearly marked help station. Test onsite printing equipment before guests arrive.
15. Test the Finished Badge as an Attendee Would
Before approving the full order, request or create a physical sample. Wear it, walk around, sit down, and scan the QR code. Check whether the badge flips, reflects glare, hangs too low, or pulls awkwardly on the attachment.
Ask someone to read the name from conversational distance. View the colors under different lights. Confirm that the badge fits its holder and that the attachment feels secure.
A five-minute physical test can reveal issues that are easy to miss on a digital proof.
Put Better Badges on Your Fall Conference Checklist
Conference name badges influence far more than check-in. They help attendees introduce themselves, locate the right people, recognize event roles, access useful resources, and feel part of the experience.
Careful planning can prevent tiny names, broken QR codes, incorrect attendee information, and rushed onsite fixes. Start early, keep the design readable, test a real sample, and prepare for last-minute changes.
Name Tag Pros can help you create custom conference badges that bring together clear attendee information, event branding, durable materials, and practical attachment options. Use this fall conference name badge checklist to catch common problems before your full order goes to print.
Share Article
Categories
View Recent Blog Posts